Have you ever wondered how those crunchy, salty peanuts you snack on actually come to be? Believe it or not, you can cultivate your own patch of peanut paradise right in your backyard (or even a sunny windowsill!). But before you dive headfirst into the world of peanut cultivation, let’s crack open the secrets to successfully growing these fascinating legumes.
Peanuts, despite their name, are more closely related to peas and beans than actual nuts. They thrive in warm, sunny environments with well-drained soil. Think of a cozy beach vacation – that’s the kind of atmosphere these little guys crave. If you live in a cooler climate, fret not! You can still cultivate peanut magic by planting them in pots and providing them with a sunny haven indoors.
How to grow peanuts
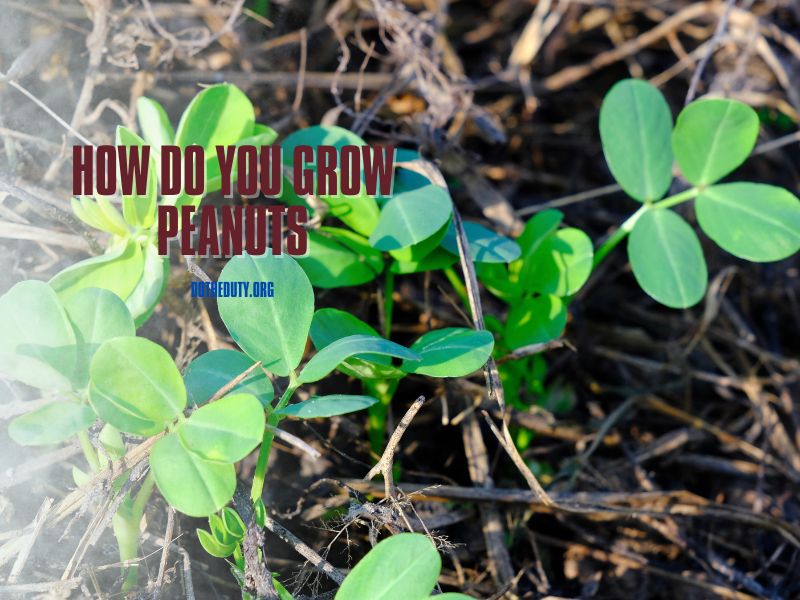
Once the threat of frost has vanished, and the soil has warmed up (think late spring or early summer for most regions), it’s time to plant your peanut seeds. Here’s the lowdown:
- Pick plump, raw, and unshelled peanuts: Roasted or boiled peanuts won’t sprout, so make sure your chosen warriors are fresh and ready for action.
- Give them some space: Plant your peanuts 3-5 centimeters deep, with a comfortable distance of 30-45 centimeters between each one. Think of it as giving them enough elbow room to party underground (peanut style, of course).
- Water wisely: Keep the soil evenly moist, but avoid creating a swamp. Peanuts don’t appreciate soggy socks, and neither do their roots!
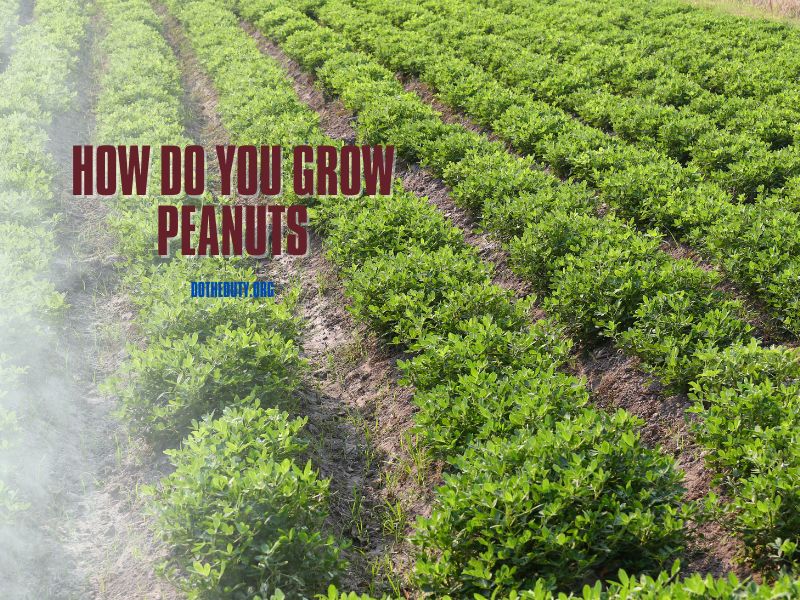
Nurturing Your Peanut Patch:
As your peanut plants sprout and grow, they’ll send out runners that burrow underground, eventually burying their precious pods. To help them on their subterranean quest, consider mulching the base of the plants with straw. This keeps the soil moist and provides a welcoming entrance for the developing peanuts.
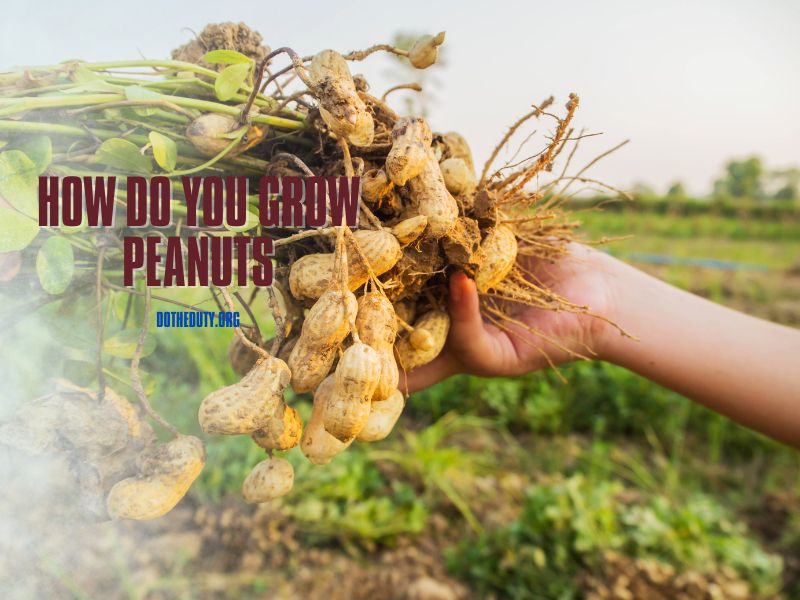
Reaping the Rewards:
After about 120-150 days (patience is a peanut-growing virtue!), your peanut plants will start to show signs of being ready for harvest. The foliage will wilt and turn yellow. Here’s your cue to carefully dig up the entire plant, remembering to be gentle with those hidden treasures underground. Once you’ve unearthed your peanut bounty, spread them out in a dry, well-ventilated area to dry for a couple of weeks.
The Final Chapter: Curing and Enjoying Your Peanuts:
Once the peanuts are dry, gently remove the pods from the plant. Now comes the fun part – curing! Store your peanuts in a dry, well-ventilated spot for another two weeks. This allows them to develop their full nutty flavor and extend their shelf life. After this final step, your homegrown peanuts are ready to be enjoyed in a multitude of ways – roasted, boiled, or even transformed into a creamy peanut butter fit for royalty (or at least, your taste buds).
Bonus Tip: Feeling adventurous? Save some of your dried peanuts to plant next season, perpetuating your peanut-growing legacy!
So, there you have it! With a little sunshine, some TLC, and this guide as your compass, you’re well on your way to cultivating a thriving peanut patch and enjoying the fruits (or rather, nuts) of your labor. Happy planting!